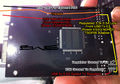
E3
| This article is marked for rewrite/restructuring in proper wiki format. You can help PS3 Developer wiki by editing it. |
Files @ http://www.ps3devwiki.com/files/flash/Tools/E3/
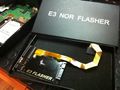
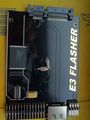
E3 Flasher
Where to get it
Official listed on E3 site
- World Wide forums
- Asia
- North America
- South America
- Europe
- Australia
- Russia
Other
- World Wide
- http://a liexpress.com/
- Australia
- The Netherlands
- Germany
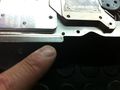
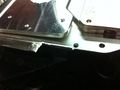
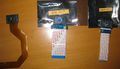
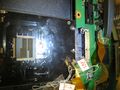
Picture Guide
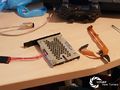
01- that's all you need from the Limited package
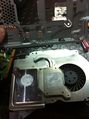
02- Remove the fan screws to detach it from the metal cage
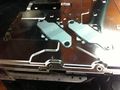
03- cut 2cm from this corner
04- 2cm cut from the corner

05- apply masking tape to protect the CLip Flat cable
06- install the Fan with the bottom metal plate and the heatsink screws
07- don't forget to connect back the FAN plug
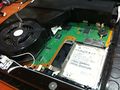
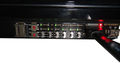
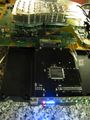
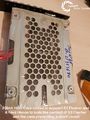
08- install everything back into the plastic bottom case

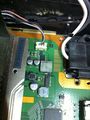
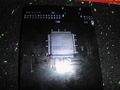
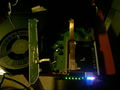
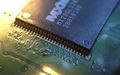
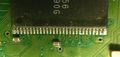
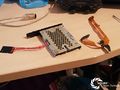
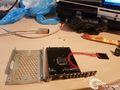
09- now you can access the NOR freely and add manual pressure on the clip while working
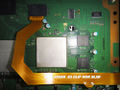
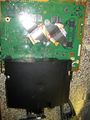
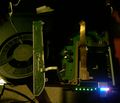
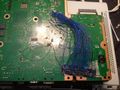
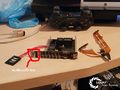
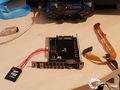
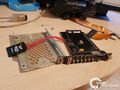
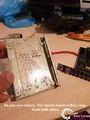
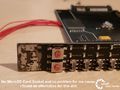
10- E3 with clip installed and ready for dumping and flashing
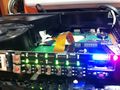
11- E3 board dumping NOR
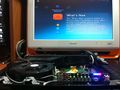
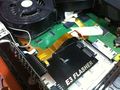
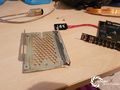
12- E3 in Action with PS3 idle on XMB


How to
Update E3 Flasher
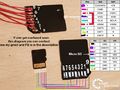
1. Use blank micro SD card and copy the update.bin or Samsung Update: Multi Consoles file on to the root of it.
It is recommended to use the Samsung Update. Remember to check its MD5 before writing it to the E3.
8D1A10F45049B5DC1223D6008ED238DD
2, Place the micro SD card into the E3 flasher and flip up all switches except 1 & 2.
3. Turn the console on and the install will begin automatically. The LED's on the indicator will progressively reach 100% (Once finished they will flash alternatively).
4. Turn off the console and flip down all of the switches.
Make a NOR backup
1. Place a blank micro SD card into the E3. Flip all switches down except the 3rd (Backup). Turn on the console. Once the HD light has stopped flashing, press START on the E3 and wait until the LED's on the indicator have reached 100% (Once finished they will flash alternatively).
2. Remove the bkpps3.bin from the SD card and validate it before doing anything else with it. Once you have done that, back it up again and compare MD5 to ensure that your clip is stable enough for the downgrade process.

Getting errors?
If you get a 10000101, 10000100, 10001100, 10001101 Error then you need to reseat or apply pressure to the E3's clip and try again.
When you initially clip onto a fresh board it will 100% make a clicking sound when it is fully attached. This does not guarantee it will work, but its a good indicator. Generally you should get the E3 clip and put it on an angle (45 degrees) next to the NOR (so you can see the clip's pins), align that with the pins on the NOR chip and drop it down like a lid.
Regarding pressure, it all depends on how many times you have tried to clip it. The more you clip onto the NOR the weaker its pins get, it will no longer make that click sound and it won't stay on its own. If you are after a permanent install you should put some foam or something squeezable on top of the NOR chip (roughly 2-3cm tall that can compress to 1-1.5cm) and reassemble the PS3 (Which causes pressure on the NOR). If you do not care for a permanent install try using a clamp, clip or vice as seen in this image.
Once you have got a successful read you shouldn't start assuming its error free. Check the dump you have and if it appears valid you should not be touching your clip again (to prevent any bricking when downgrading).
Checking the NOR backup for errors
(remove the micro SD card from the flasher and place the card in your pc)
(if you have updated the flasher or recently purchased one you will see three backups on the microSD card bkpps30.bin, bkpps31.bin & bkpps32.bin and the e3flasher text log file)
Bytereverse them with Flowrebuilder and use Validating flash dumps
KEEP THE OTHER BACKUPS SAFE! just incase you do happen to brick your console you might have a chance for recovery..
E3 Nor dump checker
| Warning |
|---|
| This tool is known and proven to give false positives on bad dumps that lead to permabricks.
Use this method: Validating flash dumps to make sure the dumps are in crisp condition. You cannot recover from bad flash without proper dumps (e.g. bricking the console beyond repair). |
Downgrade
Normal E3 Downgrade Process
1. Place the e3_downgrade.bin and the bkpps3.bin you made on a micro SD Card.
2. Flip all switches down, except the last one (Lock/Unlock). Turn the PS3 on. While in the XMB press START on the flasher and the programming process will begin. The LED's on the indicator will progressively reach 100% (Once finished they will flash alternatively). From this point you have the option to check the log which is saved on the MircoSD which will tell you if the writing process was successful or not - this may or may not be a valid indicator.
3. Power off the console completely (with the switch on the rear or by unplugging it). Flip down the Lock/Unlock switch. Turn on the console and you should see the 'Connect controller using a USB cable' screen. If the console just booted back into the XMB you need to manually patch the backup. Turn it back off again.
From this point on, follow the main guide starting from Reinstall firmware in Factory Service Mode
Manual Downgrade Process (Recommended)
1. Patch your bkpps3.bin with BwE NOR/NAND Patcher or patch it manually (Do not accidentally patch the byte-reversed version after validating). Once that's done, place it by itself on a micro SD Card.
2. Flip all switches down. Turn the PS3 on. While in the XMB press START on the flasher and the programming process will begin. The LED's on the indicator will progressively reach 100% (Once finished they will flash alternatively). From this point you have the option to check the log which is saved on the MircoSD which will tell you if the writing process was successful or not - this may or may not be a valid indicator.
From this point on, follow the main guide starting from Reinstall firmware in Factory Service Mode
Flash Fun Downgrade Process (Highly Recommended) - also for Debricking
Requires soldering! See also E3's official PDF on repairing a bricked console
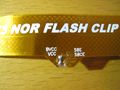
1. Solder the Tristate of the PS3 to the SBE pad on the E3's ribbon.
2. Patch your bkpps3.bin with BwE NOR/NAND Patcher or patch it manually (Do not accidentally patch the byte-reversed version after validating). Once that's done, place it by itself on a micro SD Card.
3. Flip all switches down, except the first one (Flash Fun). Turn the PS3 on (If you get a 1101111 error the Tristate is not on correctly). When PS3 is powered on, press the START button on the E3 and wait for the LED's on the indicator to reach 100% (Once finished they will flash alternatively). From this point you have the option to check the log which is saved on the MicroSD which will tell you if the writing process was successful or not - this may or may not be a valid indicator.
4. Flip all switches down and from this point on, follow the main guide starting from Reinstall firmware in Factory Service Mode
(Note: When debricking from 4.x MFW, patch at step 2 used is noFSM and at step 4 the MFW 4.x firmware is reinstalled using Recovery Menu, not Factory Service Mode)
How To Patch Your Dump Manually
E3 dumps are byte reversed, and so must our patches (otherwise we have to reverse, paste the v2 in the REV, reverse back again - using byte reversed patches shortcuts that 'reversing confusion')
Dump the flash with the E3, you will end up with a .bin file (e.g. bkpps3.bin)

http://www.ps3devwiki.com/files/flash/patches/E3%20downgrade/
| target area | patch no. | NOR Offset | Paste length | Remarks |
|---|---|---|---|---|
| ROS0 | patch1.REV (7 MB) [1] | 0x0C0010 | 0x6FFFE0 | version string 3.55 |
| ROS1 | patch1.REV (7 MB) [2] | 0x7C0010 | 0x6FFFE0 | same as patch1.REV |
| trvk_prg0 (0x40000) trvk_prg1 (0x60000) trvk_pkg0 (0x80000) trvk_pkg1 (0xA0000) |
rvk-040000.REV (512 KB) [3] | 0x40000 | 0x80000 | one big patch overlapping several area's |
(above patches in a single package + autopatcher file: E3%20downgrade.rar [4])
Using autopatcher from Flow Rebuilder:
- select "PATCH a Byte reversed NOR dump or an interleaved and unscrambled NAND dump."
- Select as Input Dump File the unmodified dump (AC 0F FF E0 / AD DE EF BE)
- Select as Patch file: E3-downgrader\progskeet_patch.txt
Use the patched file, rename to bkpps3.bin, put on SD and use E3 to flash the ps3. To flash a manually patched backup put all the switches on the flasher down and press start while in the XMB
From this point on, follow the main guide starting from Reinstall firmware in Factory Service Mode
Error Codes

LED Error
number 1 stands for LED Blinking
number 0 stands for LED OFF
NOTE:
Once you press START for any writing setting, the first thing the E3 will do is erase the NOR.
Any errors AFTER pressing START will result in the NOR being half erased.
Do not power off the PS3 - Apply pressure to the clip and hit START again - Repeat process until the lights begin to progress.
| Error Codes | Meaning | Remarks | |||||||
|---|---|---|---|---|---|---|---|---|---|
| 0 | 1 | 0 | 0 | 0 | 0 | 0 | 0 | Failed to initialize TF card | SD card not seated properly / Can't open bkpps3.bin |
| 0 | 1 | 0 | 0 | 0 | 1 | 0 | 0 | Failed to read files in TF card | SD card not seated properly / Can't find bkpps3.bin (Check its file name) |
| 0 | 1 | 0 | 0 | 1 | 0 | 0 | 0 | Failed to open TF card | SD card not seated properly / Can't find bkpps3.bin (Check its file name), or... cannot find e3_downgrade.bin (Flip switch #6 'Lock / Unlock') |
| 0 | 1 | 0 | 0 | 1 | 1 | 0 | 0 | Failed to write files to TF card | SD card not seated properly |
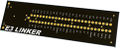
| 1 | 0 | 0 | 0 | 0 | 1 | 0 | 0 | Failed to initialize NOR in E3 | Check E3 Linker Pads / Reattach ribbon on E3 - It is not on properly. |
| 1 | 0 | 0 | 0 | 0 | 1 | 0 | 1 | Failed to read NOR in E3 | Check E3 Linker Pads / Reattach ribbon on E3 - It is not on properly. |
| 1 | 0 | 0 | 0 | 0 | 1 | 1 | 0 | Failed to erase NOR in E3 | Check E3 Linker Pads / Reattach ribbon on E3 - It is not on properly. |
| 1 | 0 | 0 | 0 | 0 | 1 | 1 | 1 | Failed to write NOR in E3 | Check E3 Linker Pads / Reattach ribbon on E3 - It is not on properly. |
| 1 | 0 | 0 | 0 | 1 | 1 | 0 | 0 | Failed to initialize PS3 BIOS | Check E3 Linker Pads / Reattach or apply pressure to clip on PS3 / Reattach ribbon on E3 - It is not on properly. |
| 1 | 0 | 0 | 0 | 1 | 1 | 0 | 1 | Failed to read PS3 BIOS | Check E3 Linker Pads / Reattach or apply pressure to clip on PS3 - It is not on properly. |
| 1 | 0 | 0 | 0 | 1 | 1 | 1 | 0 | Failed to erase PS3 BIOS | Check E3 Linker Pads / Reattach or apply pressure to clip on PS3 - It is not on properly. |
| 1 | 0 | 0 | 0 | 1 | 1 | 1 | 1 | Failed to write/erase PS3 BIOS | Check E3 Linker Pads / Reattach or apply pressure to clip on PS3 - It is not on properly. |
| 1 | 1 | 0 | 0 | 0 | 0 | 0 | 0 | Wrong settings of switches | Check toggle switch - wrong setting |
| 1 | 1 | 0 | 0 | 0 | 0 | 1 | 0 | PS3 is operating NOR, E3 Flasher cannot operate at the same time | Check toggle switch - wrong setting / Reattach ribbon on E3 |
| 1 | 1 | 0 | 0 | 0 | 1 | 0 | 0 | Not the right PS3 for this backup | Already used e3flasher on 1 console |
| 1 | 1 | 0 | 0 | 1 | 0 | 0 | 0 | Wrong PS3 version, not supported at present | Metldr.2 model undowngradable |
| 1 | 1 | 0 | 0 | 1 | 1 | 0 | 0 | Wrong function settings | Check toggle switch - wrong setting |
| 1 | 1 | 0 | 0 | 1 | 1 | 1 | 1 | Missing Tristate | Check SBE (Tristate) connection on ribbon |
Problem state 1
- 10000100 - E3 can not initialize PS3 Nor Chip
- 10001100 - Error initializing the PS3 BIOS
- 10001101 - Error while reading PS3 BIOS
- 10001111 - Error writing PS3 BIOS
Problem: bad solder points / E3 Nor Clip does not work right with Ps3 Nor
solution:
- check solder points (resolder)
- refit the Nor Clip by smoothing it down with a little screwdriver / sandpaper
- clean contacts on Nor and E3 Clip with Isopropylalkohol 70% -
- use pads or cardboard to press down Nor clip
- solder using E3 linker (best permanent solution)
- you can find the right pinouts for your board on the Hardware flashing page

Notes:
- dont use to much pressure on the Nor because you will destroy the solder balls of your southbridge and damage your system ..
- dont glue the inside of the clip to the nor chip
Problem state 2
- 10000101 - Reading error (E3 Nor)
- 10000111 - Error writing E3 Nor
- 10000110 - Error deleting data on E3 Nor
- 10001110 - Error erasing PS3 BIOS
Problem: faulty solder points / E3 Nor Clip does not work right with Ps3 Nor / E3 Nor bricked
solution:
- check solder points
- clean contacts on Nor and E3 Clip with Isopropylalkohol 70%
- use pads or cardboard to press down Nor Clip
- reset E3 flasher while system is running (little red button on the upper side of the flasher / NOT little red button on front panel under Esata !!)

Notes:
- dont use to much pressure on the Nor because you will destroy the solder balls of your southbridge and damage your system ..
- dont glue the inside of the clip to the nor chip
Problem state 3
- 01000000 - Error initializing TF /SD card
- 01001000 - Error opening data from SD/TF card
- 01001100 - Error writing data from SD/TF card
solution:
- check if TF/SD Card is sitting accurate
- Format your SD/TF Card to FAT 32
- Rename your backup bkpps3 for writing to PS3 NOR / bkpe3 for writing to E3 NOR
Problem state 4
- 11000000 - Wrong position of switches (the action you selected is not possible)
- 11001100 - Wrong position of switches (the action you selected is not possible)
- 11000010 - PS3 is using NOR / you cant use E3 Flasher at the same time / SDcard bad
solution:
- change position of switches
Note: On newer E3 versions there seems to be a high chance to get this error without any proper reason .. If you checked the position of switches and still get this error send your flasher in for replacement !!! As the error seems to appear quite often with the "new" models we tried a lot of ideas but nothing worked (cleaning faceplate contacts; using different faceplate; using different clip; soldering all wires to E3 Linker, adjusting pins ...)
Problem state 5
- 11001000 - Wrong PS3 Version / Not supported PS3 Version (Metldr2 or nonrecognised metldr)
Solution:
- Reclip
Problem state 6
- 11000100 - corrupt backup of PS3 data
- 11000100 - Not the right PS3 for this backup
Solution:
- check backup for errors (flowrebuilder etc) / make a new clean dump
- User already used e3flasher on 1 console and did not update E3 itself with multiconsole update.bin on top of this page.
Problem other frequent problems and solutions
HDD in Esata Station cant be found
- restrip contacts on the backside of the E3 Flasher (they must not touch the metal casing)
- they have to be isolated very good .. they are very sensitive and cause a lot of errors
- check Esata cable ..
Blackscreen with no hdd activity and only hard reset possible (no brick)
- remove clip and try again
- try getting into FSM with a faster power/eject combo
- if you manually patched, check if you did not patch the byte-reversed copy
- attempt flashfun downgrade
- resolder SBCE -> A / cut A/B properly
- restrip contacts on the backside of the E3 Flasher (they must not touch the metal casing) they have to be isolated very good .. they are very sensitive and cause a lot of errors
- if the E3 flasher is not connected, also ALWAYS disconnect the clip otherwise blackscreen because of A/B Cut ..
In case your usb ports are still working:
- 3.55 ONLY: use the rsod/brickfix lv2diag in Service Mode (helped my system a lot .. it booted to blackscreen 8/10 times; after using lv2diag 2/10 times)
- if using TBv2 please note, that instead of proper security they used loops to protect their product; try reinstalling the FW via recovery mode
- also dont use custom boot logos with TBv2 !!
- Reinstall a downgrader prepatched FW
- if you have no success with the methods from above solder Tri/SBE and reflash a valid backup via flash fun mode (100000)
ylod behavior (3 beeps and turns off)
There are two possible solutions .. Always try a) first then b)
- a) Dualboot only:
- Wrong HDD in Esata Station
- After downgrading your PS3 you have to install the SAME firmware on BOTH hdds then upgrade one HDD to OFW .. the error will be gone than ..
- Example: downgrade to 3.55 kmeaw .. put 3.55 kmeaw on BOTH hdds via Recovery Mode .. then update your OFW HDD to 4.11 OFW ..
- Wrong HDD in Esata Station
- b)Brickfix:
- well done .. you bricked your PS3 :)
- Solder SBE to Tristate .. use Flash Fun Mode (10000000) to reflash the valid back up of the firmware revision you bricked on ..
- well done .. you bricked your PS3 :)
TrueBlue Dongle not working with dualboot (only red light)
After downgrading your PS3 you have to install the SAME firmware on BOTH hdds then upgrade one HDD to OFW .. the error will be gone then ..
Example: downgrade to 3.55 TBv2 no check .. install 3.55 TBv2 no check on BOTH hdds via Recovery Mode .. then update your OFW HDD to 4.11 OFW ..
NOTE: This has to be done EVERYTIME you update your OFW HDD to a higher firmware (for example also if you update from 4.11 to 4.20 !!!)
No Blue Leds (only red power led)
The Nor Clip is installed the wrong way .. you have to turn it 180° and reinstall it to the NOR ..
The E3 flat cable has to lead away from the flasher NOT in the direction of the flasher ..
Dualboot error: MFW HDD corrupted
After updating your OFW HDD to a higher firmware your MFW HDD gets an error message and needs to be updated too
Solution
- Resolder SBCE - A again;
- Make sure the cut between A/B is deep enough
- First solder then cut the connection between A/B !
solder points (SBE / SBCE) torn off E3 ribbon cable
solder points (SBE / SBCE) torn off E3 ribbon cable
Solution
- use alternate points on backside of E3 flasher

IFI0 Tag missing at offset 200
E3 finishes back up process without error, but Nor Patcher and Flowrebuilder finish with errors (bootloader 0kb/ IFI0 Tag missing at offset 200)
Solution
- Format SD Card again (Fat32)
- Reinstall and clean the contacts of the nor clip (not pressure issue but contact issue / dust etc.)
- clean linker to flatcable on E3 flasher

- if you still get this error you damaged the flatcable of your nor clip (Very easy to do !!)Replacement part needed ..
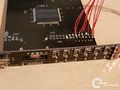
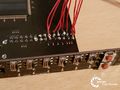
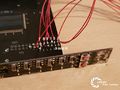
E3 - Coverboard - switches

| Mode flashfun (1) ps3mode (0) |
Firmware CFW (1) OFW (0) |
Read/Write Backup (1) Program (0) |
Backup OB Flash (1) microSD (0) |
Program OB Flash (1) PS3Flash (0) |
Locking Unlock (1) Lock (0) |
Remarks |
|---|---|---|---|---|---|---|
| 0 | 0 | 0 | 0 | 0 | 0 | |
| 0 | 0 | 0 | 0 | 0 | 1 | |
| 0 | 0 | 0 | 0 | 1 | 0 | |
| 0 | 0 | 0 | 0 | 1 | 1 | |
| 0 | 0 | 0 | 1 | 0 | 0 | |
| 0 | 0 | 0 | 1 | 0 | 1 | |
| 0 | 0 | 0 | 1 | 1 | 0 | |
| 0 | 0 | 0 | 1 | 1 | 1 | |
| 0 | 0 | 1 | 0 | 0 | 0 | |
| 0 | 0 | 1 | 0 | 0 | 1 | |
| 0 | 0 | 1 | 0 | 1 | 0 | |
| 0 | 0 | 1 | 0 | 1 | 1 | |
| 0 | 0 | 1 | 1 | 0 | 0 | |
| 0 | 0 | 1 | 1 | 0 | 1 | |
| 0 | 0 | 1 | 1 | 1 | 0 | |
| 0 | 0 | 1 | 1 | 1 | 1 | |
| 0 | 1 | 0 | 0 | 0 | 0 | |
| 0 | 1 | 0 | 0 | 0 | 1 | |
| 0 | 1 | 0 | 0 | 1 | 0 | |
| 0 | 1 | 0 | 0 | 1 | 1 | |
| 0 | 1 | 0 | 1 | 0 | 0 | |
| 0 | 1 | 0 | 1 | 0 | 1 | |
| 0 | 1 | 0 | 1 | 1 | 0 | |
| 0 | 1 | 0 | 1 | 1 | 1 | |
| 0 | 1 | 1 | 0 | 0 | 0 | |
| 0 | 1 | 1 | 0 | 0 | 1 | |
| 0 | 1 | 1 | 0 | 1 | 0 | |
| 0 | 1 | 1 | 0 | 1 | 1 | |
| 0 | 1 | 1 | 1 | 0 | 0 | |
| 0 | 1 | 1 | 1 | 0 | 1 | |
| 0 | 1 | 1 | 1 | 1 | 0 | |
| 0 | 1 | 1 | 1 | 1 | 1 | |
| 1 | 0 | 0 | 0 | 0 | 0 | |
| 1 | 0 | 0 | 0 | 0 | 1 | |
| 1 | 0 | 0 | 0 | 1 | 0 | |
| 1 | 0 | 0 | 0 | 1 | 1 | |
| 1 | 0 | 0 | 1 | 0 | 0 | |
| 1 | 0 | 0 | 1 | 0 | 1 | |
| 1 | 0 | 0 | 1 | 1 | 0 | |
| 1 | 0 | 0 | 1 | 1 | 1 | |
| 1 | 0 | 1 | 0 | 0 | 0 | |
| 1 | 0 | 1 | 0 | 0 | 1 | |
| 1 | 0 | 1 | 0 | 1 | 0 | |
| 1 | 0 | 1 | 0 | 1 | 1 | |
| 1 | 0 | 1 | 1 | 0 | 0 | |
| 1 | 0 | 1 | 1 | 0 | 1 | |
| 1 | 0 | 1 | 1 | 1 | 0 | |
| 1 | 0 | 1 | 1 | 1 | 1 | |
| 1 | 1 | 0 | 0 | 0 | 0 | |
| 1 | 1 | 0 | 0 | 0 | 1 | |
| 1 | 1 | 0 | 0 | 1 | 0 | |
| 1 | 1 | 0 | 0 | 1 | 1 | |
| 1 | 1 | 0 | 1 | 0 | 0 | |
| 1 | 1 | 0 | 1 | 0 | 1 | |
| 1 | 1 | 0 | 1 | 1 | 0 | |
| 1 | 1 | 0 | 1 | 1 | 1 | |
| 1 | 1 | 1 | 0 | 0 | 0 | |
| 1 | 1 | 1 | 0 | 0 | 1 | |
| 1 | 1 | 1 | 0 | 1 | 0 | |
| 1 | 1 | 1 | 0 | 1 | 1 | |
| 1 | 1 | 1 | 1 | 0 | 0 | |
| 1 | 1 | 1 | 1 | 0 | 1 | |
| 1 | 1 | 1 | 1 | 1 | 0 | |
| 1 | 1 | 1 | 1 | 1 | 1 |
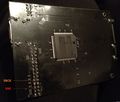
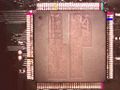
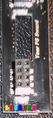
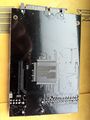
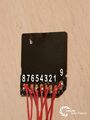
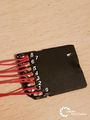
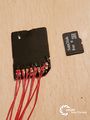
Picture Gallery
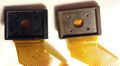
Brown & Black Clip Comparison
360Clip and E3-Clip comparison
Clip Styles
E3 - Coverbard - working status
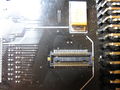
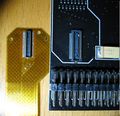
E3 - Panasonic PCB connector 50pin
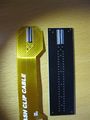
E3 Clip cable E3-Linkerboard Suit
E3 Clip NOR Slim
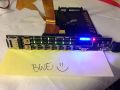
E3-flasher
E3 flex cable SBE-SBCE
E3-Linker
E3 on open DIA-002 to solve bad dumps
E3-Clip E3-Linker plug
E3-Clip inside

E3-Clip preparation
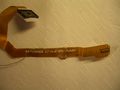
E3 Clip - Flex Cable
E3 Flasher - with clamp and coin to solve bad dumps
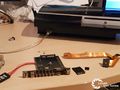
E3-Flasher - on open MB PS3-SLIM
E3-Flasher on open PS3-SLIM
E3 Flasher - on open PS3 DIA-002
E3 Flasher - Altern
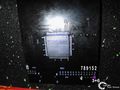
E3-Flasher - ST ARM32 microcontroller
E3-Flasher - jtag
E3 Flasher - BACK
E3 Flasher - TOP
E3Linker installed
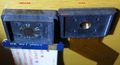
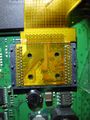
Damaged NOR. The pins are bent to the shape of the opposing pins on the E3 clip.
Above view of damaged NOR.
Alternate ways of powering & using E3
E3 powered by USB reading itself


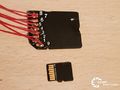
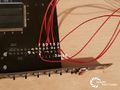
E3 Flasher SD Card Adapter Mod BY LOU@Y (Boloul98)
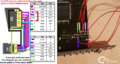
Pinout-diagram BY [email protected]
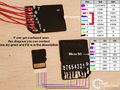
Another Pinout-Diagram BY [email protected]
Another Pinout with a clean soldered Tin in the SD Card Adapter
1
2
3
4
5

6
7
8

9
10
11
12
13
14
15
16
17
18
19
20
21
22
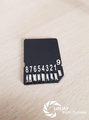
SD Card Adapter with soldered contact for wires
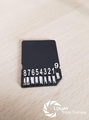
SD Card Adapter 2nd photo

SD Adapter without Solder Tin / SD Adapter with Solder Tin
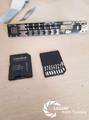
Two SD Card Adapter preparing for the mod ,that first time i try to solder 2nd SD Adapter in the tiny pins of the MicroSD Slot
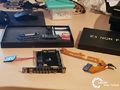
Hardawre Flashers
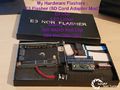
Hardware Flashers Setup NAND/NOR


.jpg)


🟊 This is a digram for anyone who face problem with the MicroSD Slot and no need to solder to the tiny pins in the Slot,
   just soldering directly to the motherboard and keep your MicroSD Slot clean :)
- Youtube Video Part 1 tested with a Good front panel :
- Youtube Video Part 2 tested with my front panel that have no MicroSD Slot :
- Last Video showing how i check the dump extracted from PS3 to SD Card in the Adapter (Dump Checked using PS3DumpChecker 495) :
External references
warning: maybe severly incomplete (always use alongside this wiki main reference pages) :
- Partial validation of dumps (French)
- E3 linker installation (French)
- E3 Installation (French)
- Debricking with E3 (French)
| ||||||||||||||||||||||||||||||||||||||