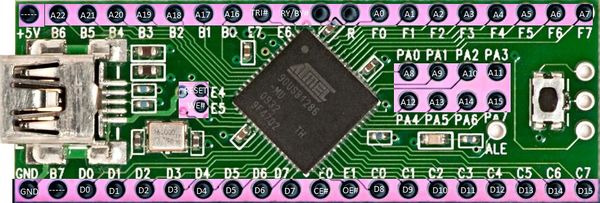
Teensy++ 2.0
Teensy 2.0 ++ Downloads
NORway
Used to analyze dumps and also contains hex files to program the Teensy itself.
- NORway git (not working link, need working mirror)
- NORway_v0.1.zip (2.26 MB)
- NORway_v0.2.zip (2.4 MB)
- norway_v0.3-master.tar.gz (2.39 MB)
- NORway_04beta10.zip (2.39 MB)
- NORway_04beta12.zip (2.39 MB)
NORway usage
Usage: %s serialport [command] [filename] [address]

serialport  Name of serial port to open (eg. COM1, COM2, /dev/ttyACM0, etc)
command     dump       Reads entire NOR to [filename]
            erase      Erases one sector (128KB) at [address]
            write      Flashes (read-erase-modify-write-verify) [filename]
                       at [address] to NOR
            writeimg   Same as write, but prepend a 16-byte length header
                       [address] is required
            program    Flashes (erase-write-verify) [filename]
                       at [address] to NOR
            release    Releases NOR interface, so the PS3 can boot
filename    Filename for [dump|write|writeimg|program]
address     Address for [erase|write|writeimg|program]
            Default is 0x0, address must be aligned (multiple of 0x20000)
Drivers & UDEV Rules
The Teensy 2.0++ needs windows drivers and linux udev rules to be recognized fully as it was meant to.
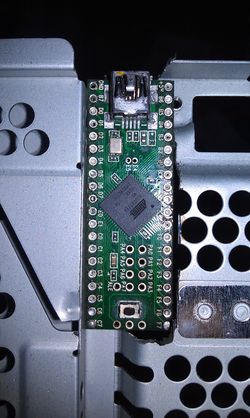
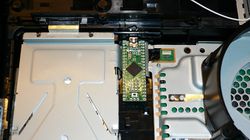
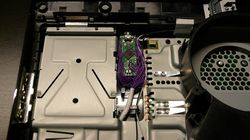
Hardware Picture
Installation Requirements
You are going to need a lot parts to accomplish such a task. This takes a lot of patience, and steady hands.
This is a difficult installation! If a part is not needed below it will be specified per model so check there as well.
Parts
The following items are required to perform the installation of the Teensy++ to most PS3 consoles.
1x Sony Playstation 3 Console
1x Teensy 2.0 ++
1x Dremel Tool
1x Drill
1x Roll of Double Sided Foam Tape
1x 30AWG Kynar Wire or 26 AWG Kynar Wire. (Few have reported 30AWG may be too small and has interference but does work if done well.)
1x Torque 10(T-10) Screwdriver
1x Torque 8 (T-8) Screwdriver
1x Regular Phillips Head Screwdriver
1x Solder (Can be leaded or no-lead)
1x Soldering Iron (Radioshack 15-30 Watt Will Work.)
1x Bottle Of Flux No-Clean
1x Bottle Of 99% Isoprobyl Alcohol
1x Box of Q-Tips (For spreading flux and alcohol where needed.)
1x Pair Of Steady Hands (Not Joking. Tremor Fingers will not cut it. You are soldering 40+ points and all must be done very well.)
1x Good Lighting (Either very well lighted room, or a Lamp. You need to be able to check your work.)
1x Magnifying Glass (To check your soldering joints for cold solders.)
1x Patience.
As you can see it requires a lot of materials to perform this kind of job. If you do not already have the parts for this kind of project, it will probably be cheaper to pay someone else to do it and ship it to and from them. Also if you are not confident in your soldering technique, it is a very realistic possibility that you will ruin your Playstation 3 Console during this process as there are a LOT of soldering joints that need to be perfectly made.
Hardware Installations (Case Modifications by CECH Model)
First open the PS3. Follow youtube videos to learn how (Just search).
Once opened, look at the motherboard model printed there. Depending on which model you have follow the case modifications below to install teensy.
There are two methods to use a Teensy 2.0++ Flasher.
1.) Install while the PS3 is somewhat opened still with everything plugged in. (Be careful of shorts.)
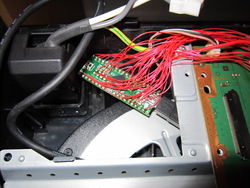
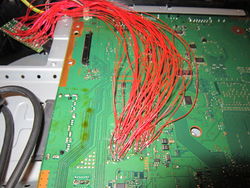
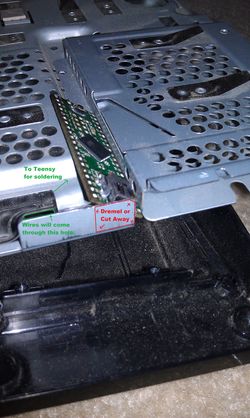
2.) Internal Case Modifications. This is the best way to go as you can install the teensy inside of the PS3 for later use. This is the advantage of using a Teensy 2.0++ because it's just small enough to install inside the PS3 with a little case modification. Other flashers are generally too large to do this with the PS3 closed up. You will find there is just no room for it.
COK-001, COK-002, COK-002W, SEM-00 1
- Need submissions. Not yet possible. Teensy can flash NANDS, but not with existing software. Someone write and submit please.
DIA-001, DIA-002
Parts not needed? Submitter please list here.
DYN-001
Parts not needed - (Torque (T-10). T-8 is still needed!)
Case Modifications Needed
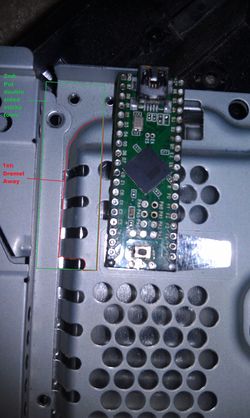
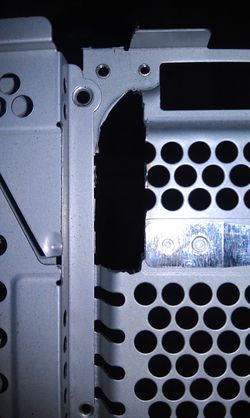
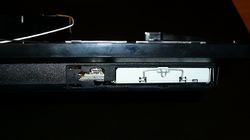
First dremel area. These 4 pictures show before and after affects and where to dremel on the top side shielding.
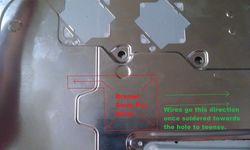
Second dremel area. These pictures show before and after affects and where to dremel on the bottom side shielding.
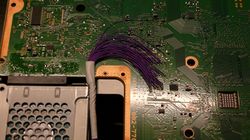
This helps with interference by running wires outside the shielding instead of inside. This method has to be done
on these models as unlike JSD-001 Models there are no holes or spaces between the HDD and shielding. It's connected
on DYN-001 Models.
JSD-001
No dremel required. Design of this CECH 2500 series has an opened hole area to put wires through.
File:Nor testpoints.png JSD-001 Motherboard NOR Test Points. |
SUR-001/JTP-001/KTE-001
- Need submissions...
